Turning Around Bends
-
Before you start on this section, make sure that you have completed the previous section, Straight Line Movement.
-
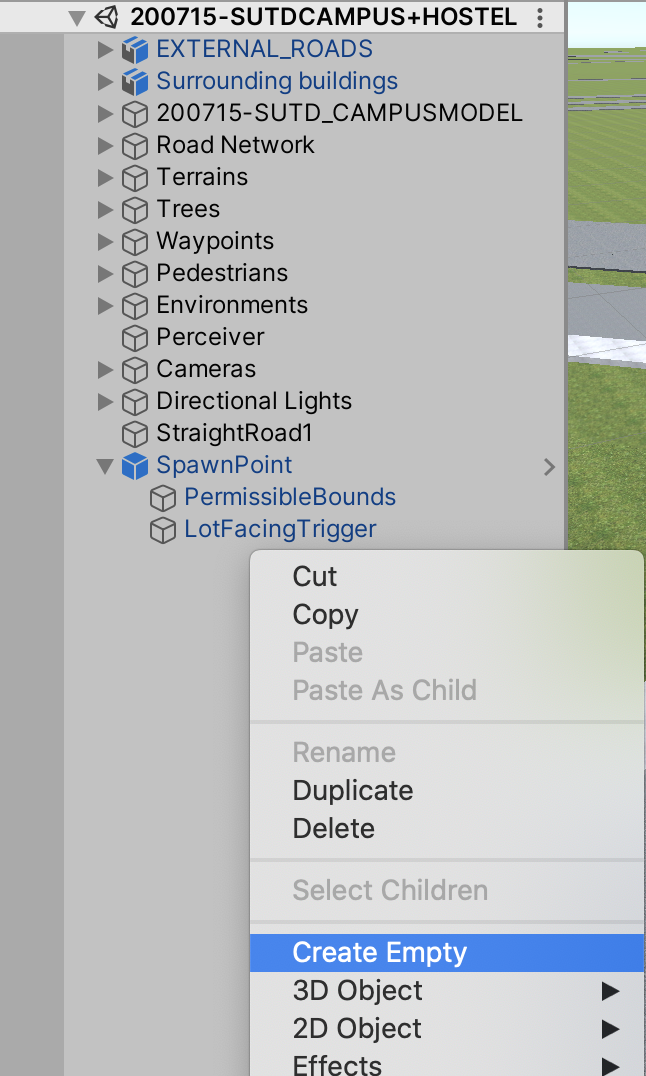
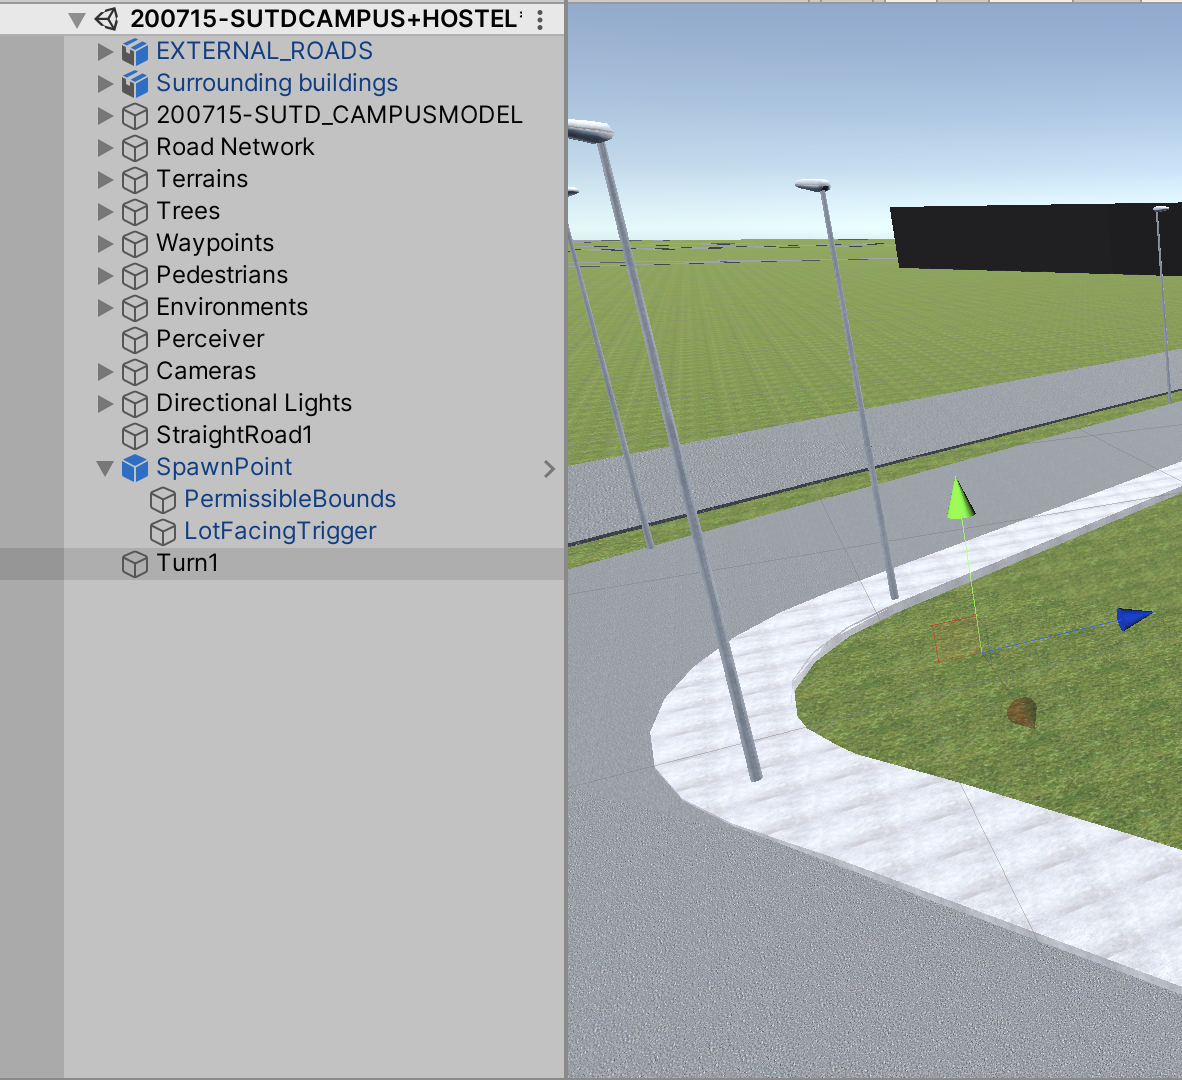
Create an Empty GameObject
-
Drag it to the corner which the turn is at, and name it something distinct such as “Turn1”
-
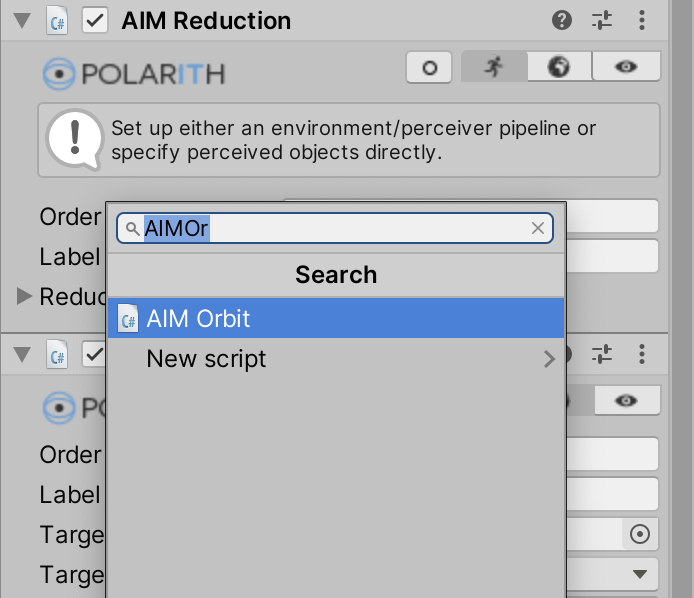
Go to the AIController Prefab located in Assets > Vehicle Simulation > CarparkDriving. In the Inspector window, click Add Component, and add AIMOrbit
-
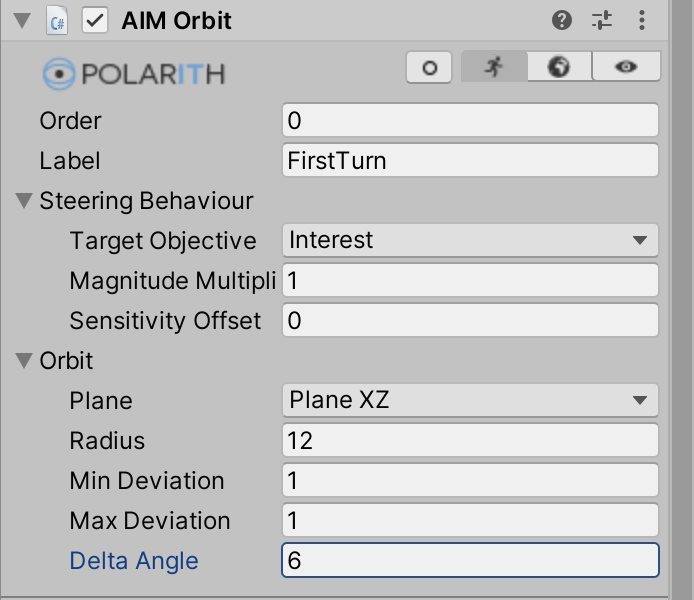
Click on the Running Man icon, and fill in the following accordingly:
- Name or Label: Distinct Label describing this behaviour
- Plane: XZ Plane
- Radius: Start off with 10, we will finetune accordingly later
- Delta Angle: Also start with -6, we will finetune later accordingly (positive value when turning clockwise, negative value when counter-clockwise)
-
Then, add the this Decision Point to the Spawn Point as an AIMOrbit object

-
Also, add this label to the Animator as an allowed behaviour
-
We also have to take into account the straight road that the vehicle will travel along after it has completed the turn. Hence, follow the exact same steps again to create the next AIMFollow behaviour
- Create GameObject and place it at the end of the straight road, name it
- Add Component “AIMFollow” in AIController and name it
- Add the subsequent Decision Point in the Spawn Point
- Add the label as an allowed behaviour in the Animator
-
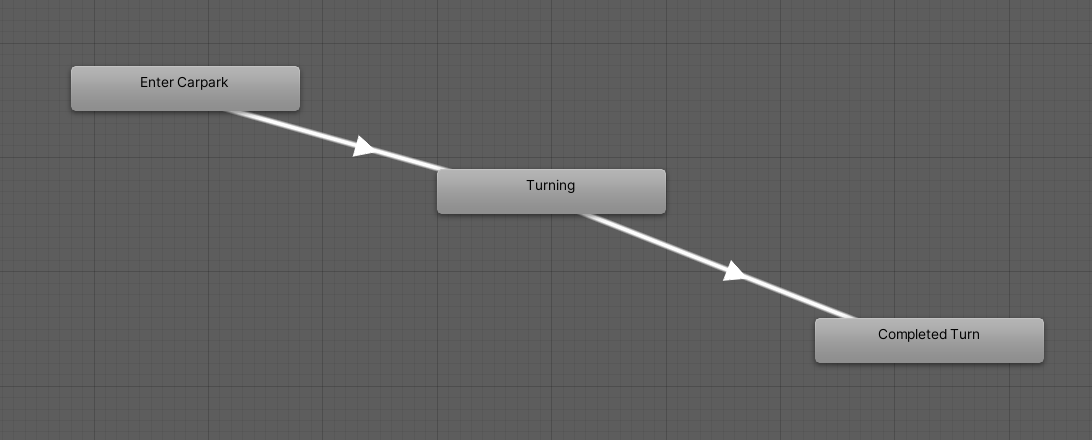
At this point, you should have the following:
-
Animator with 3 different states, each state having an allowed behaviour
-
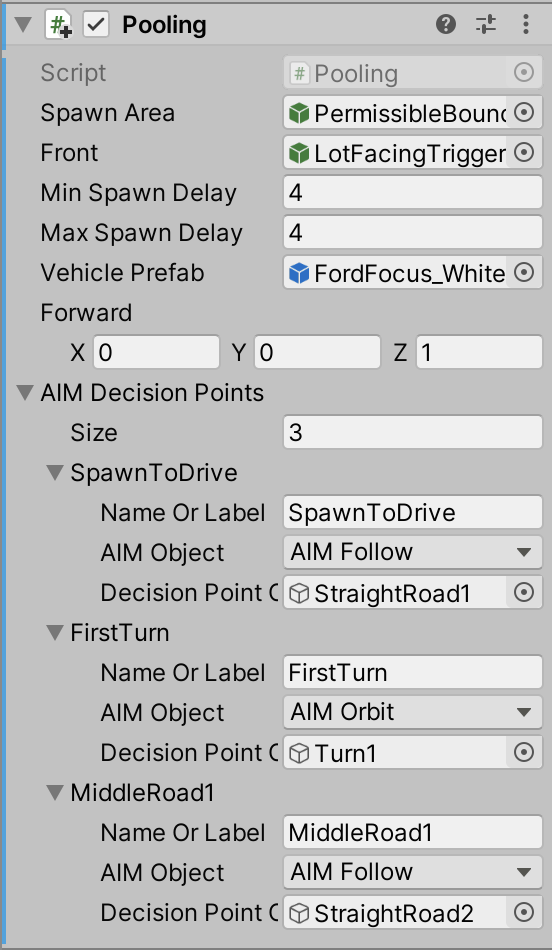
AIController module with 2 AIMFollow and 1 AIMOrbit components

-
SpawnPoint with 3 Decision Points
-
Animator with 3 different states, each state having an allowed behaviour
-
However, there needs to have a trigger to allow the state to transit from one to another. Hence, we need to create these triggers.
-
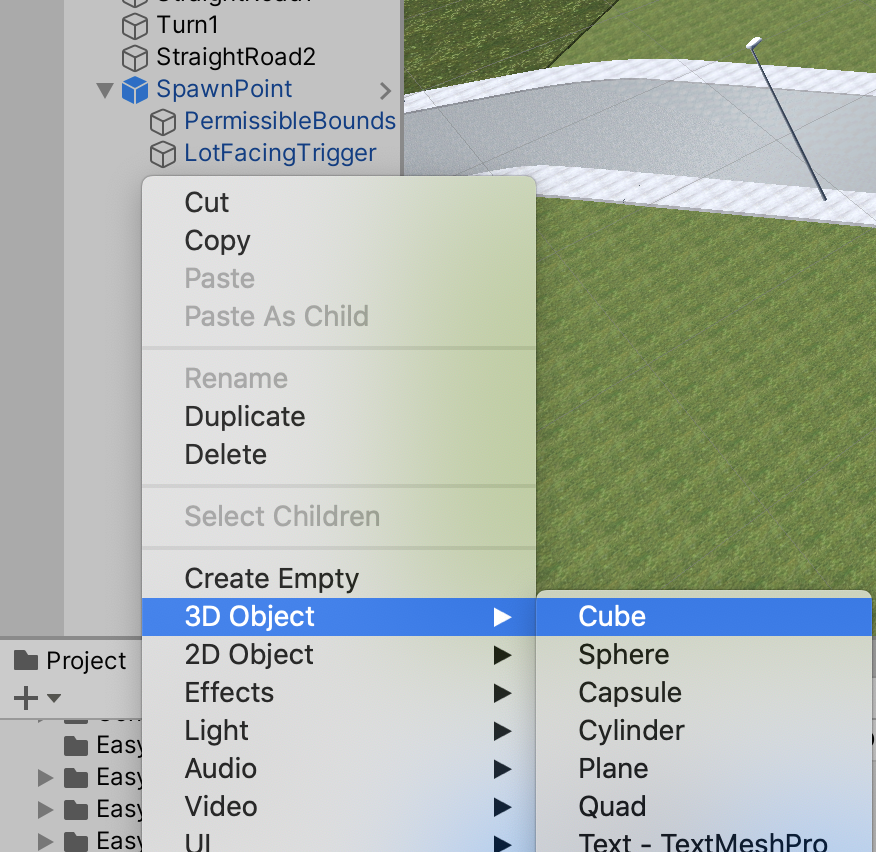
Right click on the Hierarchy and create a new Cube 3D Object.
-
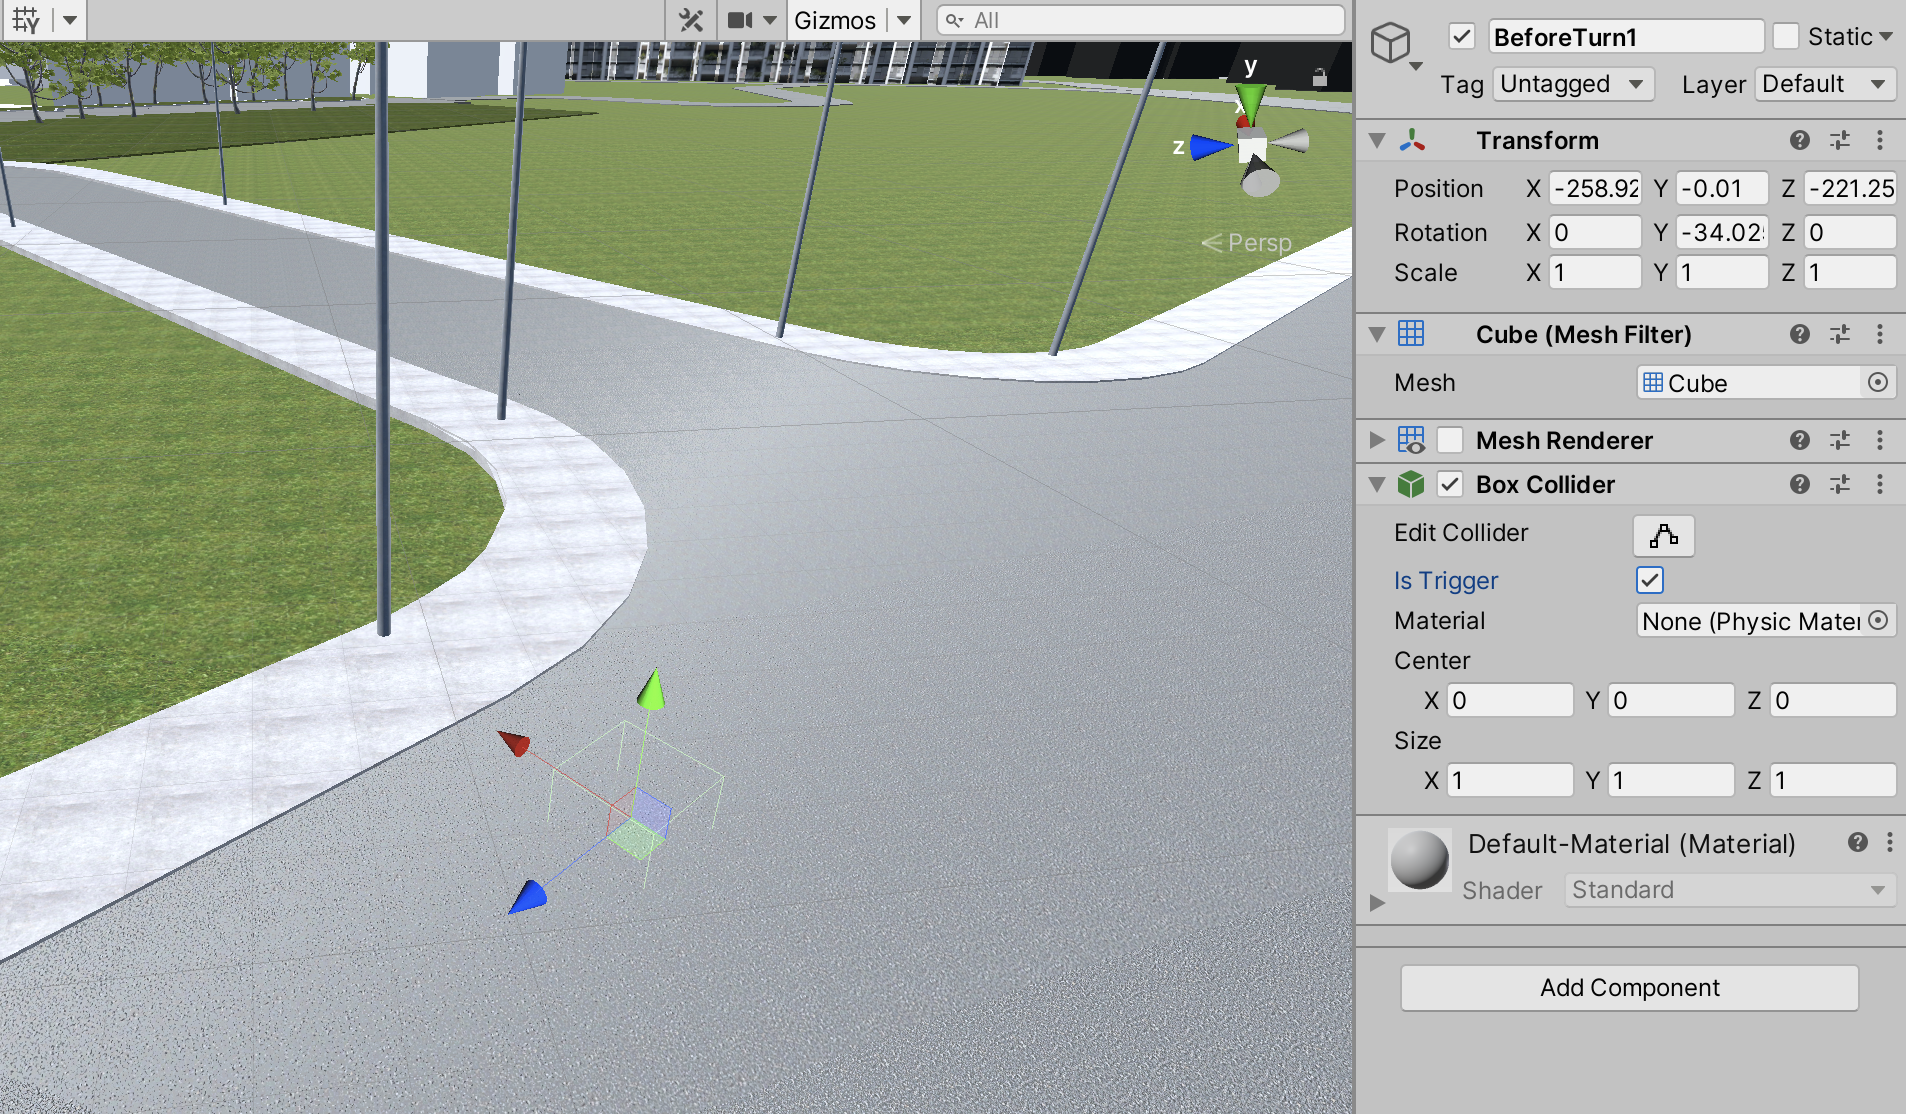
Drag it to the spot right before the turn is executed, and name it something you know. In addition, disable the mesh renderer as well as check the Is Trigger box.
-
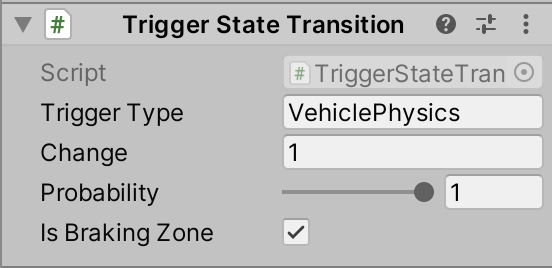
Now, add the component “Trigger State Transition”

-
Since this is to change the state from 0 (Normal Driving) to 1 (Turning), the values will be the following:
- Change: 1 (final state value)
- Probability: 1 (any number between 0-1 to determine if the vehicle will turn or not)
- Is Braking Zone: Checked (to allow for deceleration before turning)
-
Repeat steps 14-16, but this time drag the GameObject to the end of the turn. The values will be the following:
- Change: 2 (final state value)
- Probability: 1 (to complete the turn)
-
Finally, you have a complete turn. Remember to fine tune the turning in step 6 by adjusting the parameters, or shifting the trigger created in steps 12-17.
- New Updates Here