Generation of Bus Stop Asset
-
Getting the dimensions of a bus stop.
Information gotten from LTASpecific Type General Specifications(m): Generic Bus Stop Shelter: - Height: min 2.2m
- Width: 3m
- Length: increments of 3m starting from 6m up to 36m depending on number of commuters
- Thickness: 0.2m
- Height: 2.2m
- Radius: 0.1x2.2
- White
- Grey
Bus Stop that is Flushed with Kerb - Height: min 2m
- Width: 3m
- Length: increments of 3m starting from 6m up to 36m depending on number of commuters
Bus Stop with Shelter Protruding to Road - Height: 4.8m
- Width: 4.5m
- Length: increments of 3m starting from 6m up to 36m depending on number of commuters
-
Open modelling software. Ensure that the correct dimension (mm or m) settings are selected.
-
Select a street in modelling software to place street furniture in.
If there is no street that you would like to reference to, create a new street. The new street can be created by creating a ground plane in one layer and work in 2D space (line with dimension of 2.2m for one lane) to 3D space (plane). -
Layer street with points and decide whether points are parallel or perpendicular to the street.
For the spacing between points, it can be even (for bus stops it is 6m apart) or uneven (to be decided by the user). -
Create 2D outline for street furniture, be sure to include pillars and align pillars with arrayed points.

-
Work into 3D space by extruding the 2D shapes.
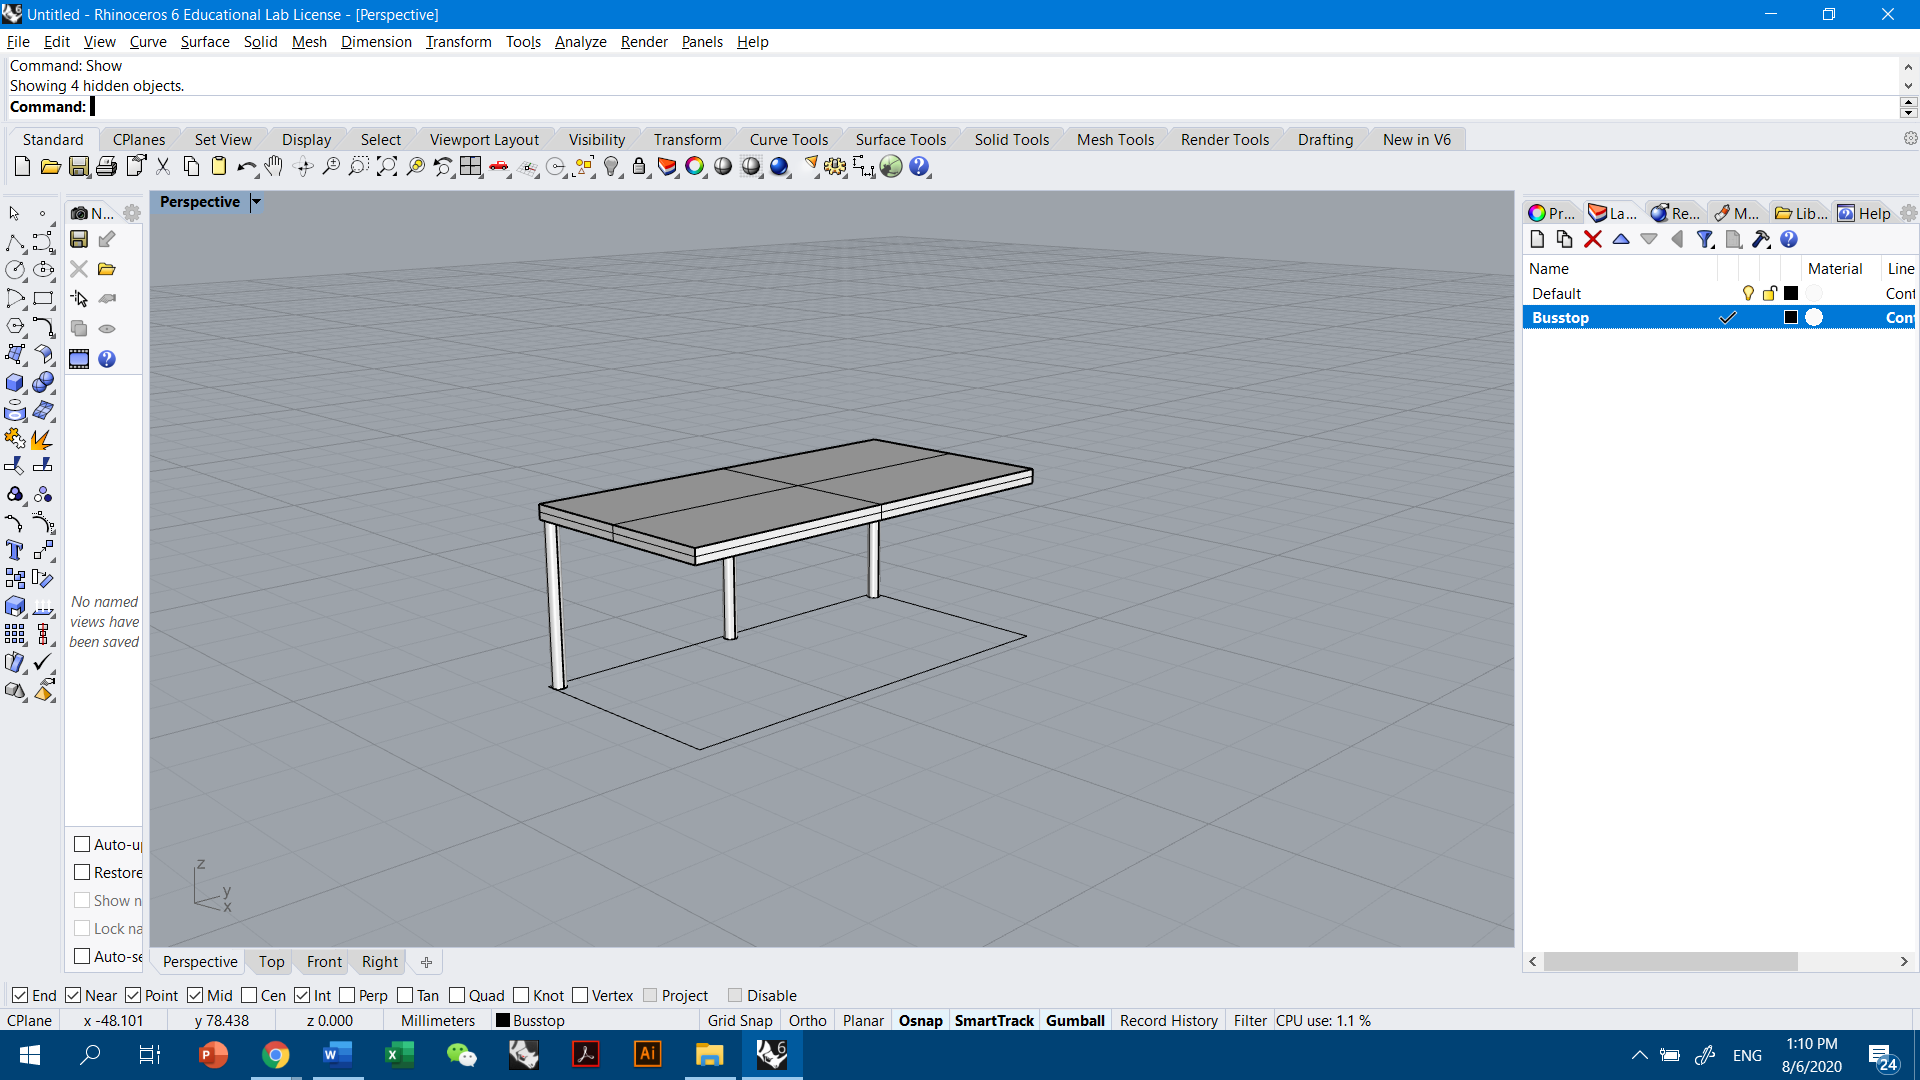
-
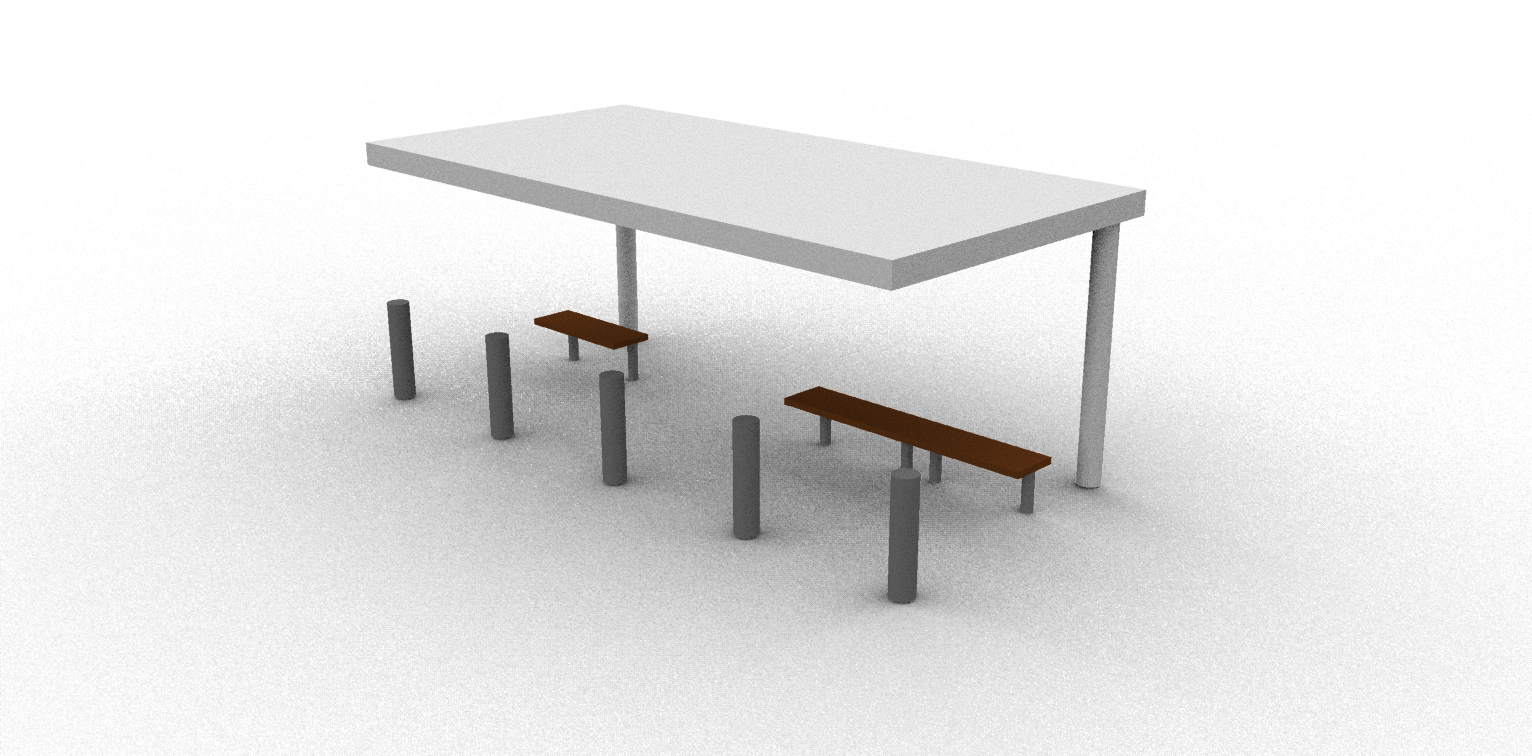
Add realism to the 3D object by adding texture and color (under the material section in Rhino CAD software, where changes reflected in Rendered view).
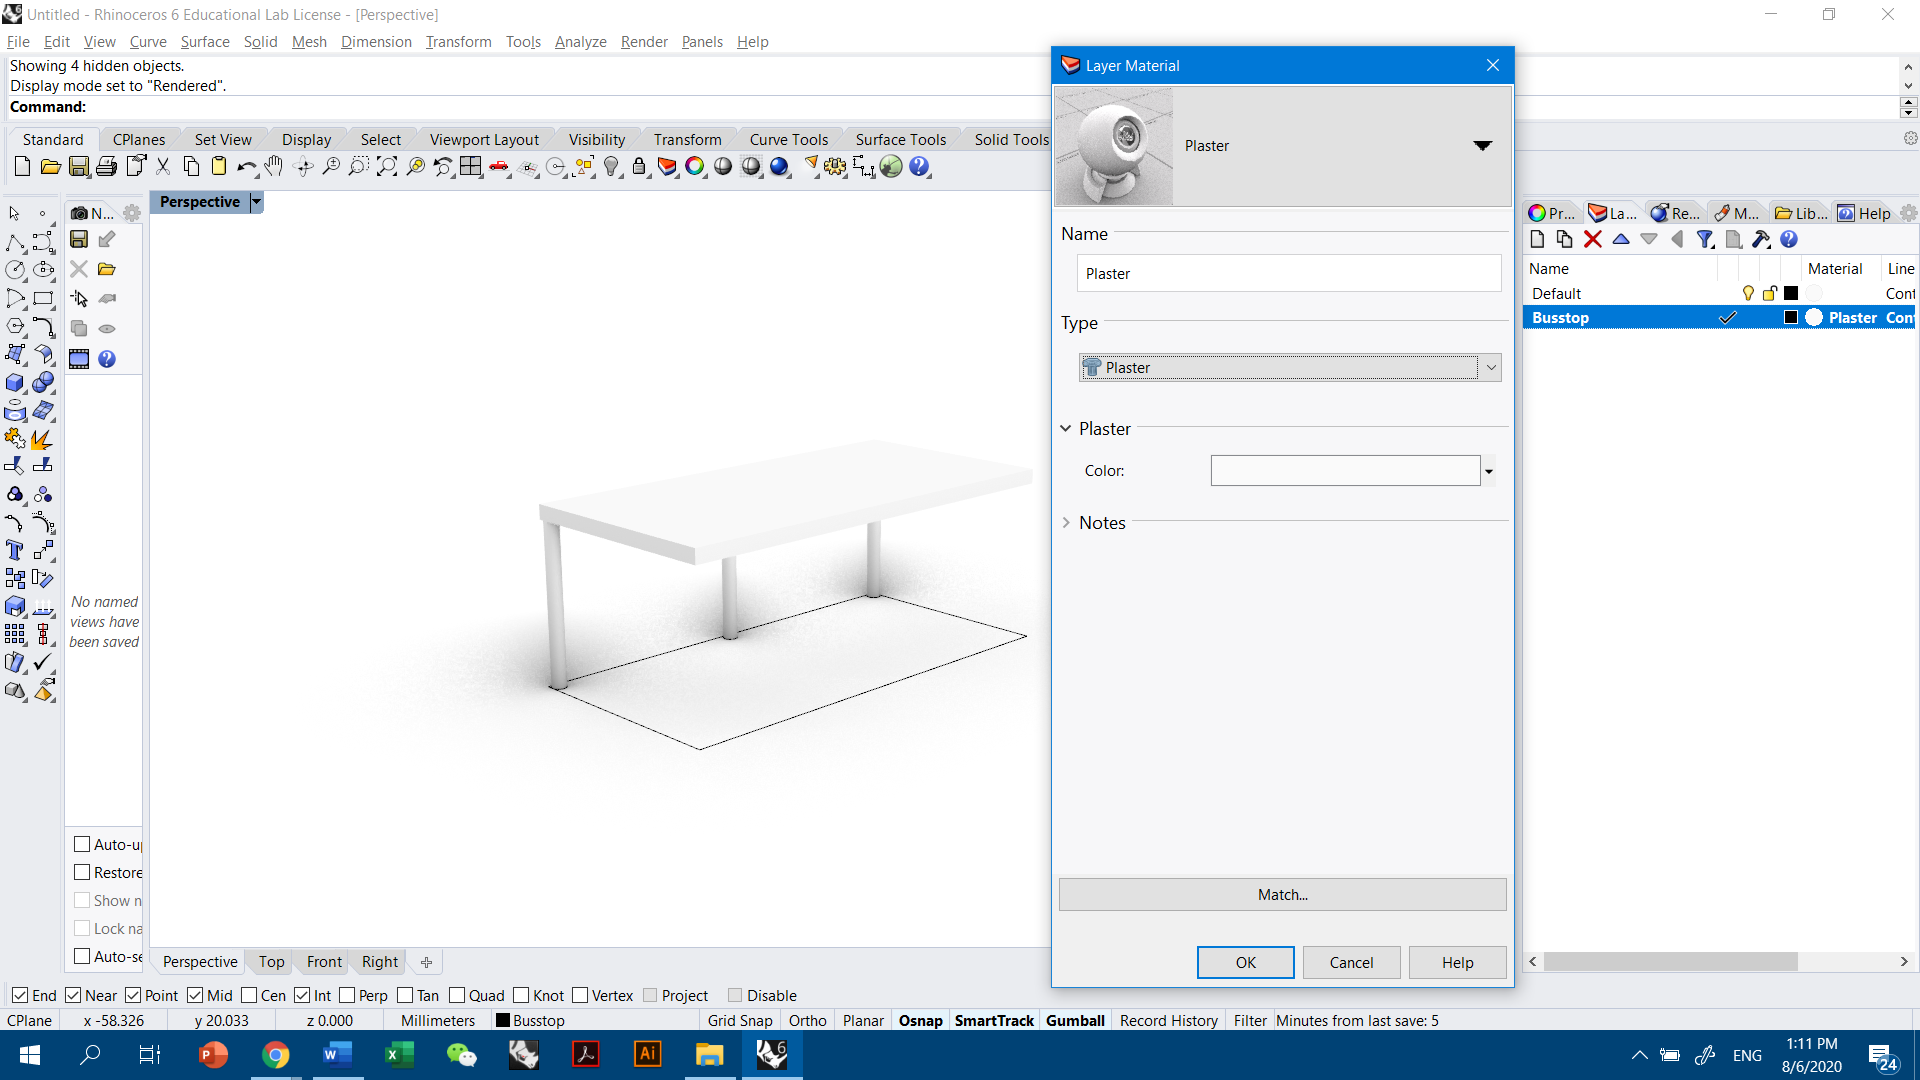
Then, orientate the furniture in the correct direction.
Lastly, group the furniture in an assigned layer and place the bus stop according to points in step 2 if multiple bus stops are required. -
OPTIONAL: Repeat steps 5 to 7 for the complementary furnitures of the bus stop with the generic dimensions as below.
Information gotten from LTASpecific Type General Specifications(m): Notice Board - Height: 1.8m
- Width: 1m
- Thickness: 0.15m
Address Plate - Height: 0.15m
- Width: 1.5m
- Thickness: 0.05m
Bench (Bench Generation) - Height: 0.45m
- Width: 0.33m
- Length: 1.2m
- Color: Grey / Brown
- *Setback 1.5m from kerb
Bollard (Bollard Generation) - Height: 0.9m
- Overall Width: 0.1m
- Distance Apart: 1.5m or 3m
- Color: Grey / White
-
Group all objects.
-
Move desired objects to (0,0,0) point in CAD software.
-
Ensure saved views (named views for Rhinoceros) are deleted. Export objects into compatible file format for the digital environment (.fbx for Unity).
- New Updates Here